=== Using the XCTU Program: ===
- Make sure everything is connected: wires, code is correct
- Make sure all Xbees recognize one another (close the plug(+)
- Make sure coordinator receives packets so you know that relay and sending Xbee works
- XCTU Program
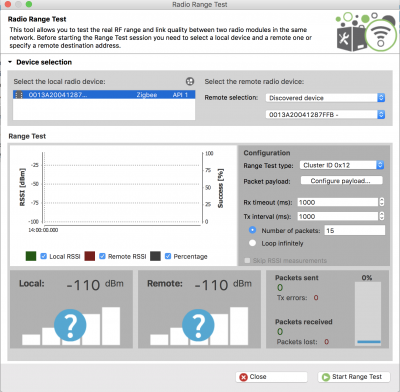
- Tools → range test
- Select remote radio device: relay Xbee
- Can choose how many packets to send (usually 15)
- Start Range Test after
https://www.digi.com/resources/documentation/digidocs/pdfs/90001526.pdf
Notes:
Upload Sending Code to Router/Sending XBee (Change to Relay Address)
- Put Xbee on Xbee shield and arduino
- Set shield to “Dline”
- When done uploading code, set back to “UART”
Upload Relay Code to ATmega 328P (Change to Coordinator Address)
- Use FTDI, connect wires to corresponding pinouts on ATMega barebumblebee
- RTS - Reset
- RX - TX
- TX - RX
- VCC - Power rail
- CTS unplugged
- GND to Ground
- Power supply should only be FTDI (unplug battery)
- Arduino Setting (tools)
- Board: Arduino/Genuino Uno
- Port: (Select)
- Programmer: “Arduino as ISP” {for bootloading} or “AVRISP mkll” {for uploading code
Note: Make sure FTDI's DTR is connected to the capacitor not Pin 1 of ATmega328p. LED on XBee should be on; not blinking?
=== Range Testing w/ PCBs ===
- Connect solar charging chip and relay xbee onto the PCB board (we used v4.0)
- Connect battery into the solar charging chip (Batt)
- Plug coordinator into computer
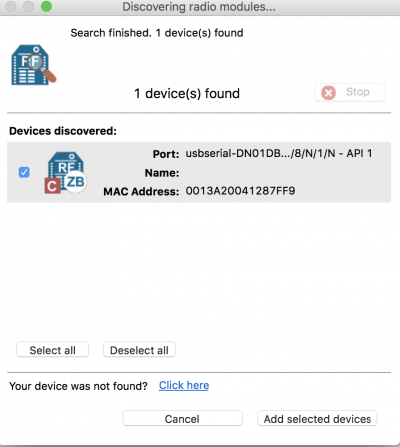
- Open XCTU program and click discover devices
- Select all ports and then click 'next'
- Dont change anything from “set port parameters” window; click 'Finish'
- Make sure coordinator is found; Mac Address: 0013A20041287FF9
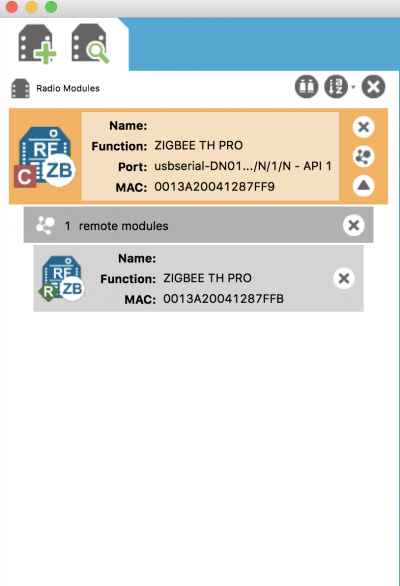
- Click on select all device and then add select device
- Looking at the “Radio Module” side, looking at coordinator, click on discover remote devices
- Make sure Relay Xbee is identified; select all and then click select devices
- Click on tools icon and select 'range testing'
- Click 'select local device“: should say something like zigbee
- Make sure remote selection says …FFB (Relay xbee)
- Change number of packets to 15
- Start Range Testing!
Authors
Contributing authors:
Created by ryoung on 2020/04/14 02:28.


